

In this article, we’ll explain how to Add, Delete and Modify users in Google Analytics. This is important as to who can access your Analytics at the Account, Property and View levels.
Step by Step Video
Levels determine what type of access the user has in the account and you can manage and assign user permissions at any time by selecting the Admin tab and clicking User Management in the Account, Property, or View column in your Analytics account.
Let’s get started:
Adding a User
-
- Sign in to your Analytics Account.
- Select the Admin tab and navigate to Account/Property/View.
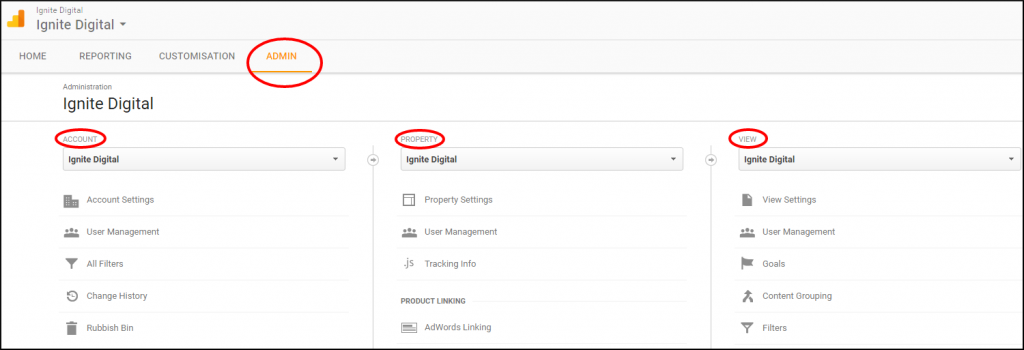
3. In the Account, Property, or View columns (you’ll choose which one depending on what type of access you want the user to have), click User Management.
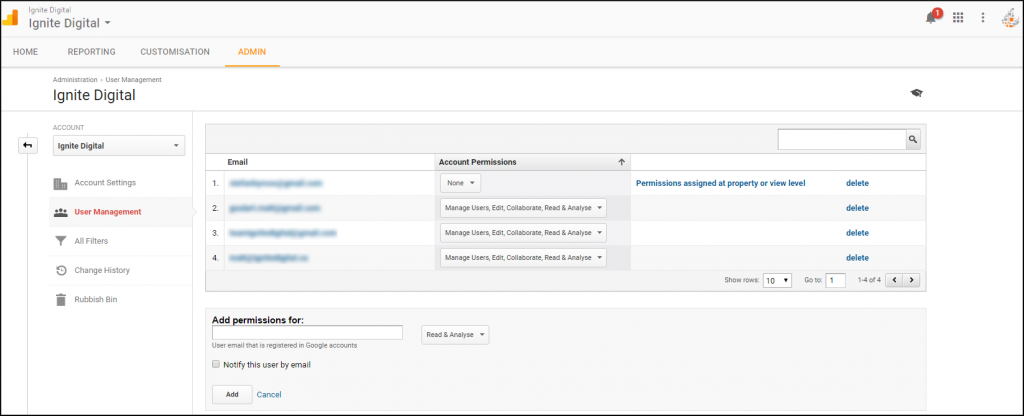
4. Under Add permissions for: enter the email address for the new user’s Google Account. (The user must have an active Google Email account)
5. Select Notify this user by email to send a notification to each new user you’re adding.
6. Click Add.
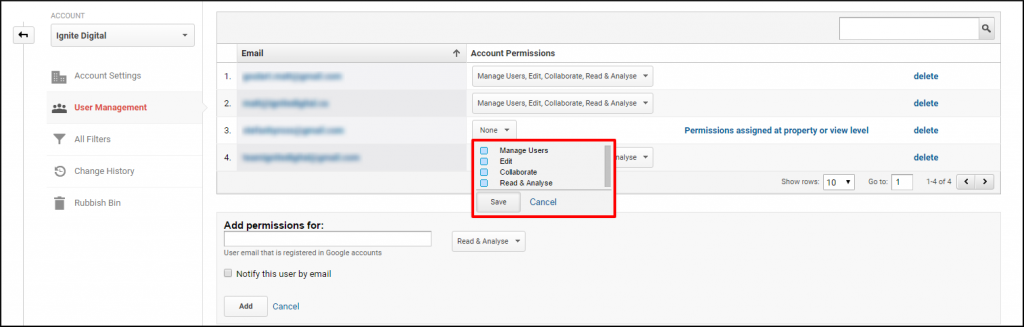
7. You should now see the new user in the box above. Within the Users row, under the Account Permissions column, click the dropdown box and select the permissions you want to give them.
You have now added a new user to your Analytics account. Congratulations! 😎
Note: You may add as many users as you’d like.
Deleting a User
Even though you can add users at any level, you can only delete users at the Account level.
-
- Sign into your Analytics Account.
- Select the Admin tab.
- In the Account column, click User Management.
- If you have many users you may want to use the search box at the top of the list to find the user you want to delete.
- Click Delete.
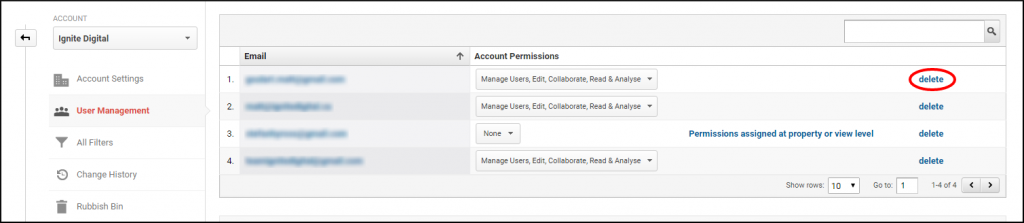
Note: Be sure to choose User Management under the Account column to delete a user as you will not see the delete option in the Property or View level.
Modifying a User
You can modify user permissions for any user at any level in your Analytics account. You can give a user more permissions as you move down the account hierarchy but you cannot give a user fewer permissions than you assigned at higher levels.
For example, if you give a user Read & Analyze permission under the Property level, they will subsequently have Read & Analyze permission in the View level. However, if you give a user edit permission in the Account level they will also have edit permissions in the property and view levels. You cannot take away edit permission in either of those levels.
-
- Sign into your Analytics Account.
- Select the Admin tab and navigate to the desired Account/Property/View level.
- Choose the column depending on what level you’d like to modify, click User Management.
- If needed, use the search box at the top of the list to find the user you want to modify.
- Use the dropdown in the Account Permissions column to add or remove permissions for the user.
- Click Save.
 It is important to give proper access to Users you allow in your Analytics account as they may need special priveledges or are in need of specific information!
If you haven’t yet set up your Google Analytics, see our How-To Set Up Google Analytics Tracking.
If you have Analytics tracking on your site already and you’re interested in what a Google Goal is and how to set one up, see our How-To Create a Goal in Google Analytics.