


Users can be included at the account or property level, determining their initial access level accordingly.
For instance, account-level users get access to all properties under that account, with a similar set of permissions.
On the other hand, property-level users can only access that specific property, based on the permissions assigned. The flexibility to modify user access levels and permissions is available at all times.
To manage users or user groups, you need an Administrator role at the account or property level. This authority is essential for recognizing users via their registered Google account emails and deleting accounts or groups, a task exclusive to the account level.
Interestingly, any user with valid permissions can delete another user. However, the last Admin user cannot delete themselves for safety reasons.
Managing users for sub-properties and roll-up properties follows a similar process, but the effects of user management can differ. For additional information on this topic, refer to the details about users in sub-properties and roll-up properties.
This guide provides help on:
- Adding users to Google Analytics 4 (GA4)
- Editing users
- Deleting users
- Creating user groups
- Adding users to a group
- Editing user groups
Moreover, to streamline the process, you can search the user list or apply filters to find user names, email addresses, Org admins, user groups, permissions, or policy violations.
Inviting Users to Analytics
You have the freedom to invite as many users as you need. Here’s a simple guide to inviting a new user to an account or property:
- Log into Google Analytics
- click on the Admin gear and choose either Account Access Management or Property Access Management (we’ll be using Account Level for our points below)

3. Click on Account Access Management.
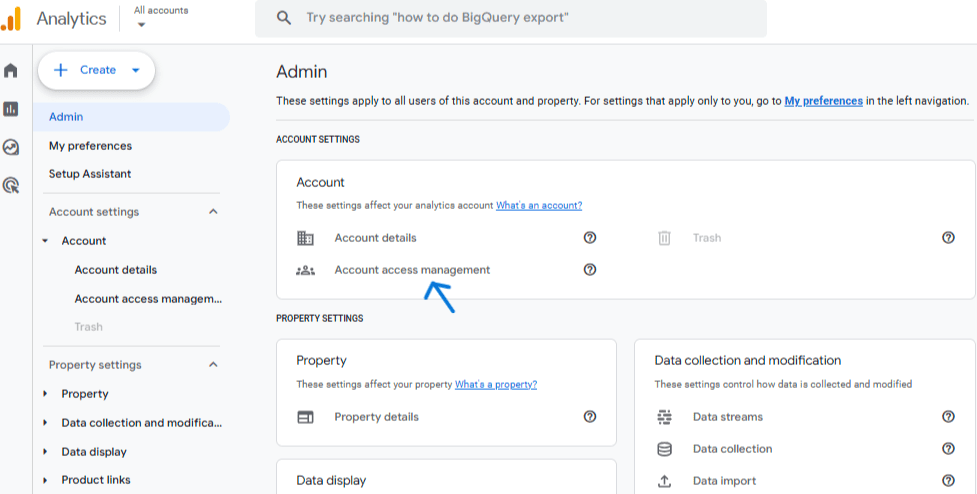
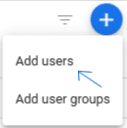
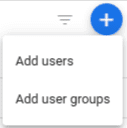
4. Click on the ‘+’ sign

5. Click on ‘Add users’.
6. Enter the user’s email address associated with their Google Account or Google Workspace Account.
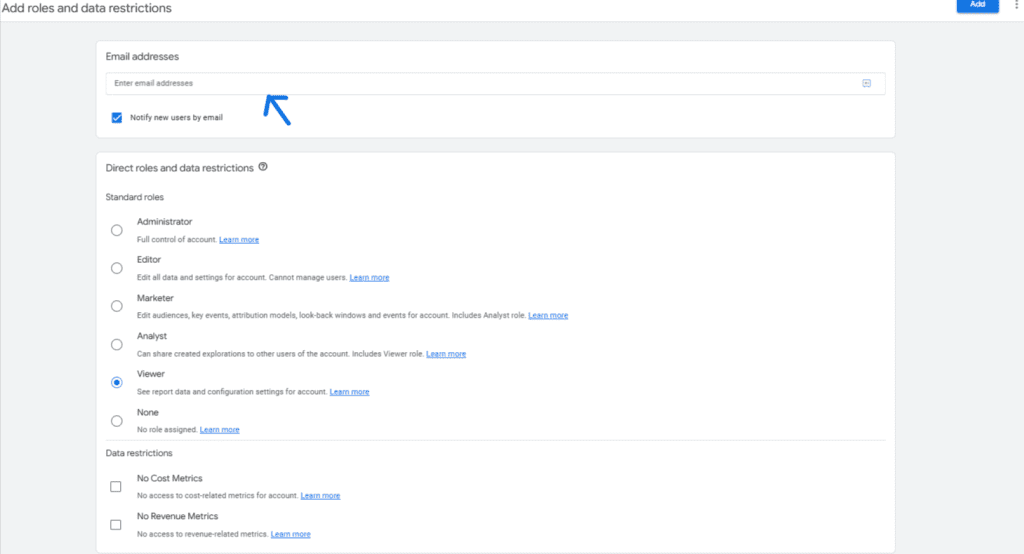
7. Select the ‘Notify new users by email’ option to send an email to the new user.
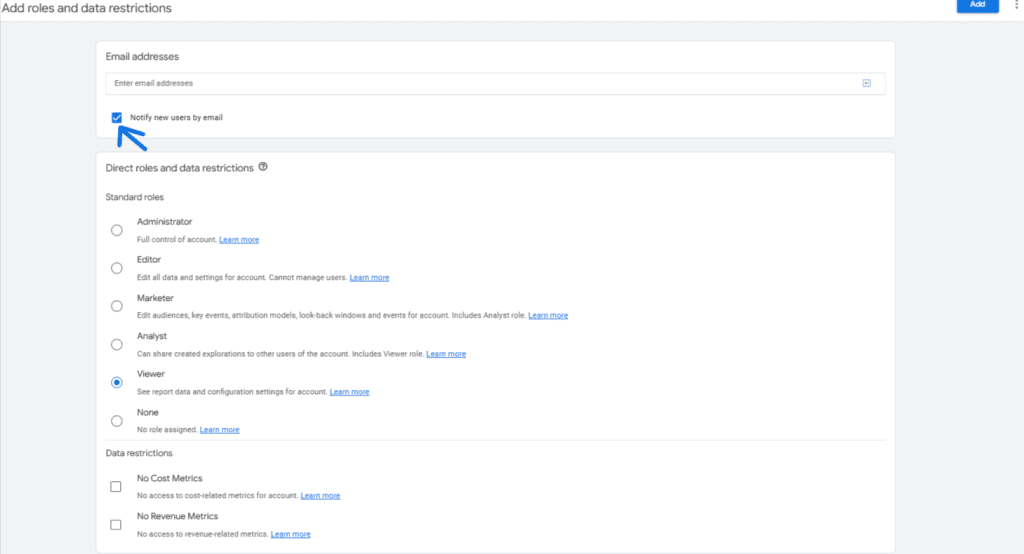
8. Select the permission level you want to grant to the user. Learn more about permissions below.
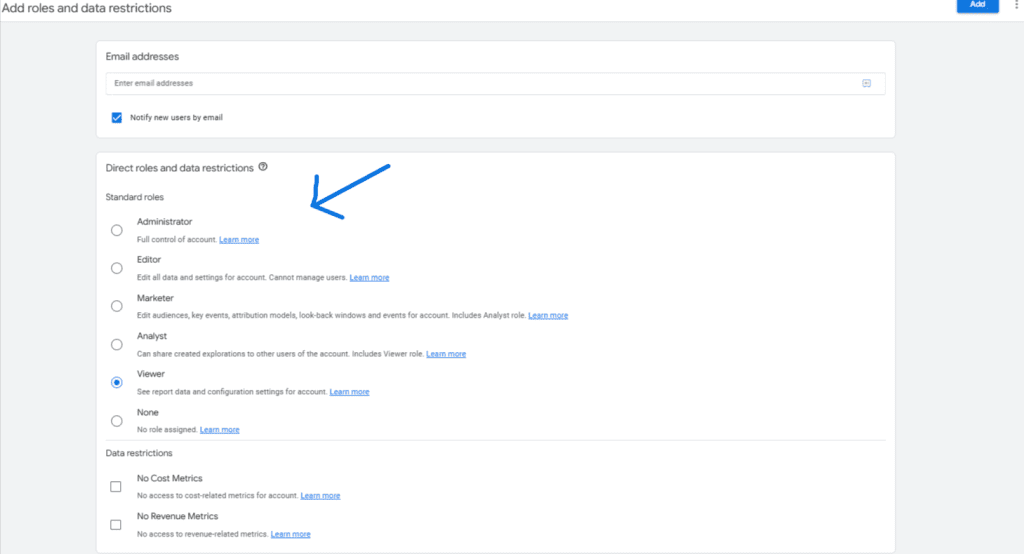
9. Lastly, click ‘Add’ (top right corner)
![]()
*IMPORTANT* The Google email address you use during the invitation process and its related password become the Analytics login credentials for that user.
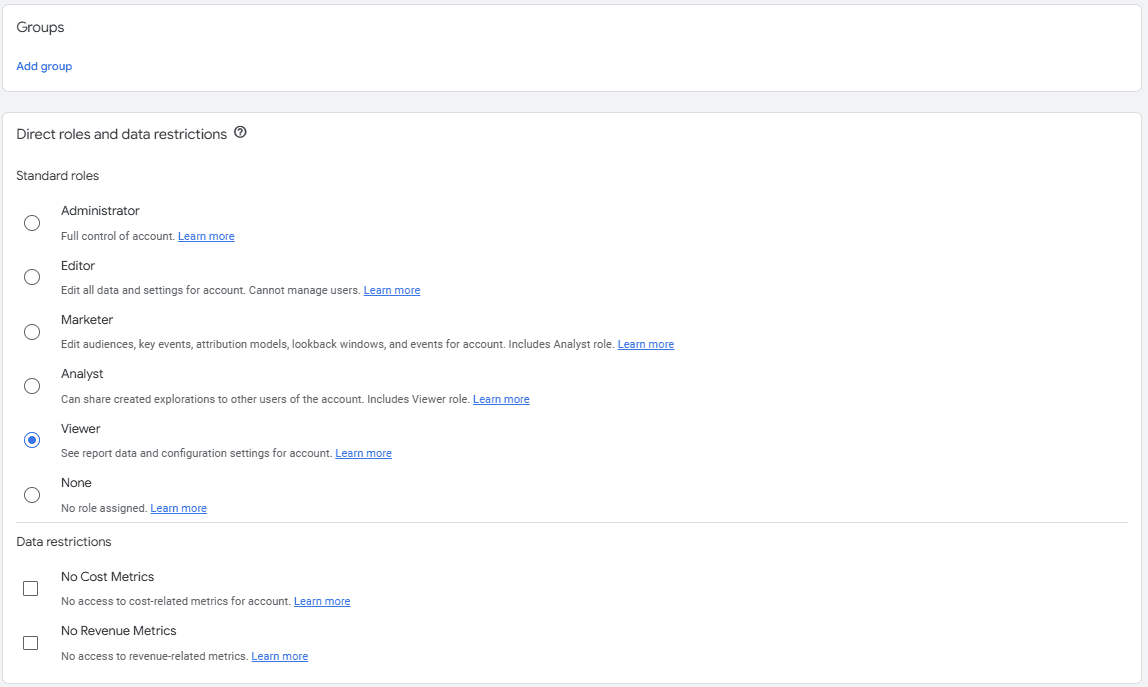
Permission Levels
Administrator – Gain complete control over Analytics. Manage users by adding or deleting them, assigning various roles or data restrictions. Grant full permissions to any user, including yourself, for any account or property under this role. This includes the permissions of the Editor role. (Replaces the Manage Users permission.)
Editor – Property-level settings control with no user management. Analyst role permissions included. (Edit permission now referred to as…) “Modify Access”
Marketer – With the ability to create, edit, and delete audiences, events, and key events, as well as modify attribution-model settings, this role encompasses the permissions of an Analyst.
Analyst – You can create, edit, and delete specific property assets. Additionally, you can collaborate on shared assets. This permission level corresponds to the Viewer role. (The new term for Collaborate permission is now defined as…) Property assets encompass items such as Explorations.
Viewer – The Read & Analyze permission has been renamed to Viewer role. Users with this role can view settings and data, customize report content (e.g., add comparisons, secondary dimensions), and access shared assets through the user interface or APIs. However, they are unable to collaborate on shared assets. For instance, individuals with a Viewer role can see shared explorations but cannot make edits.
None – The user has no role assigned to this resource. However, the user might have a role designated for a different resource.
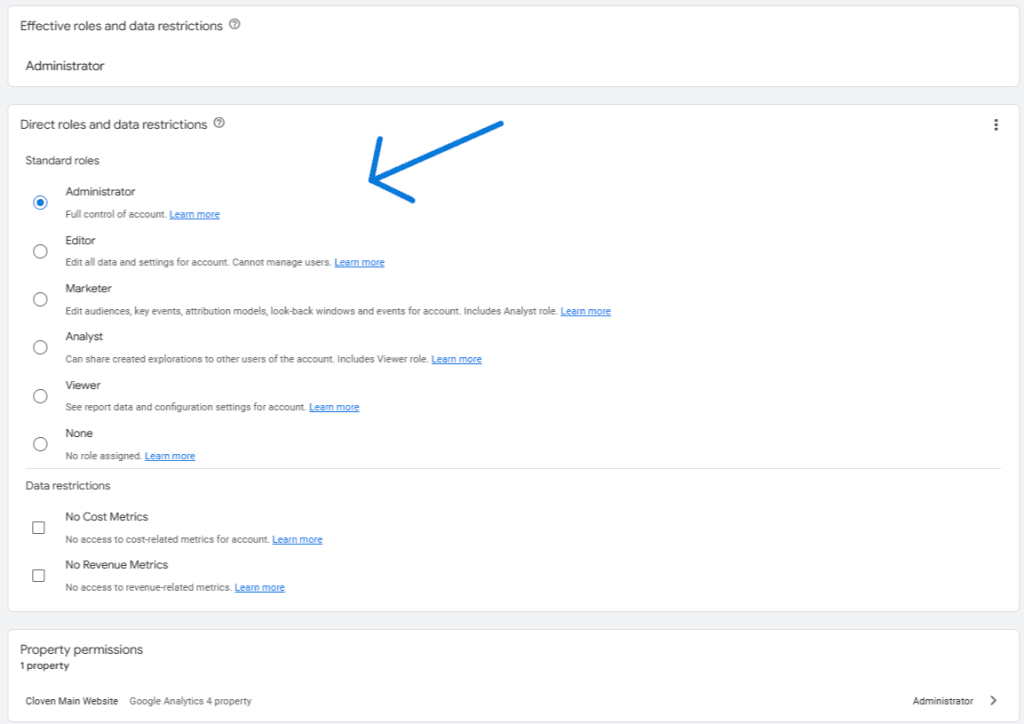
Modifying User Access
You retain the power to alter the permissions for any user at any level in an Analytics account. For instance, you may have assigned a user the Viewer role for a single property initially – you can later upgrade them to the Editor role for the same property. Alternatively, you can assign that user the Editor role at the account level, henceforth conferring them the Editor role for every property under the account.
Keep in mind that you can only amplify a user’s permissions as you descend the account hierarchy and cannot revoke permissions awarded at higher levels. For instance, if you grant a user the Editor role at the account level, they inherently acquire the Editor role at the property level (and these permissions cannot be rescinded at the property level). On the other hand, you can designate a user the Editor role at the property level, leaving the account level permissions untouched. Learn more about permissions.
To alter the access rights for a pre-existing user:
- Log into Google Analytics
- click on the Admin gear and choose either Account Access Management or Property Access Management (we’ll be using Account Level for our points below)
- Click on Account Access Management.
4. Locate the user using the search box at the top part of the list.
![]()
5. You can either enter a complete or partial address (for instance, [email protected] or johndoe).
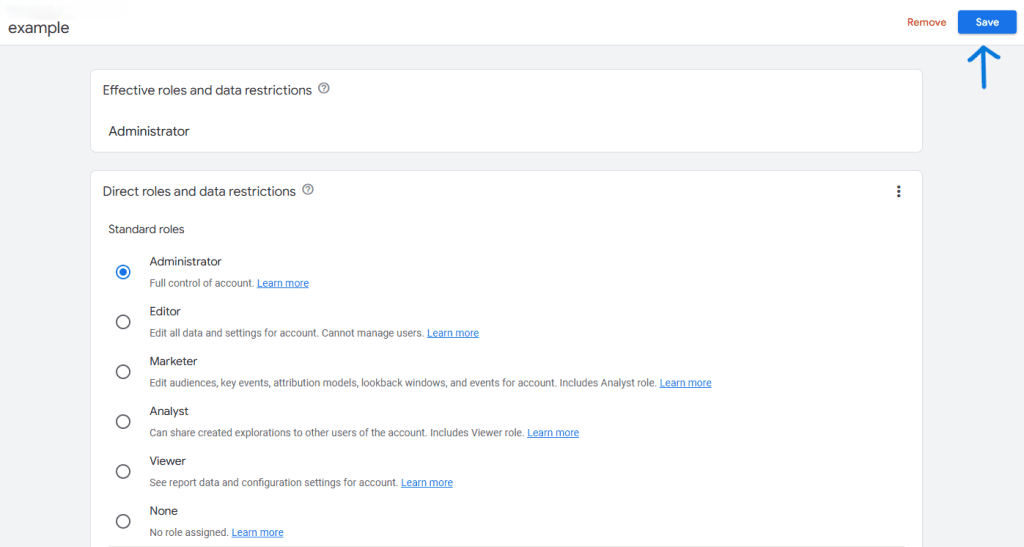
6. Select the user name and then add or remove permissions according to your needs.
7. Click on Save to finalize changes.
To remove a user:
- Log into Google Analytics
- click on the Admin gear and choose either Account Access Management or Property Access Management (we’ll be using Account Level for our points below)
- Click on Account Access Management.
4. To locate a specific user, utilize the search bar located atop the list.
5. Simply inputting either the entire address or just a part (for instance, [email protected] or johndoe) will work.
6. Once the user(s) has been identified, select the check box corresponding to them and hit the REMOVE button.
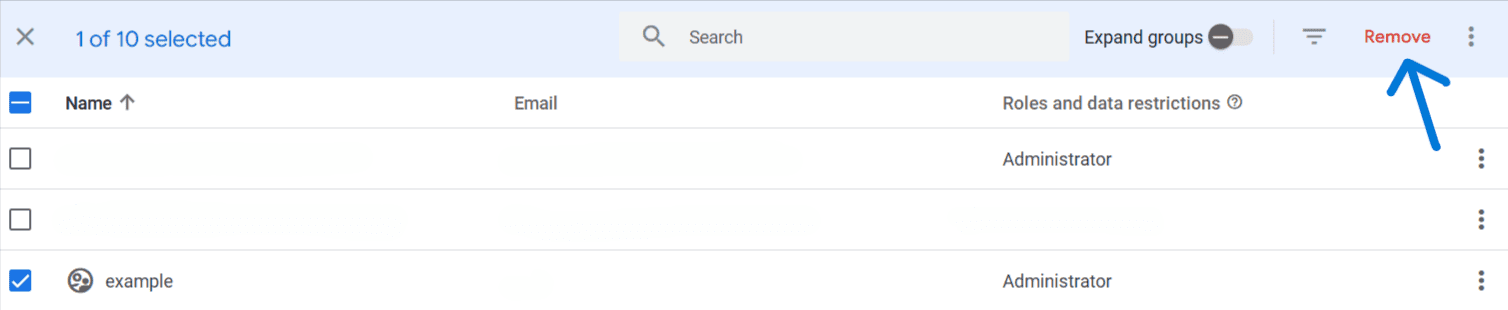
Be aware, if a user is expelled from a source property, their access to the linked subproperties is simultaneously rescinded.
By eliminating a user from a subproperty, they are only removed from that specific subproperty.
For further information on users in subproperties, explore our additional resources.
Establishing a User Group:
To create user groups, your Analytics account must be linked to an organization. If your account isn’t connected to any organization, Analytics will guide you in setting up and linking to one when you create your first user group.
- Log into Google Analytics
- click on the Admin gear and choose either Account Access Management or Property Access Management (we’ll be using Account Level for our points below)
- Click on Account Access Management.
4. Click on the ‘+’ sign

5. Click on ‘Add user groups’.
6. Press +, input a unique name and a brief description for the group, and confirm by clicking CREATE.
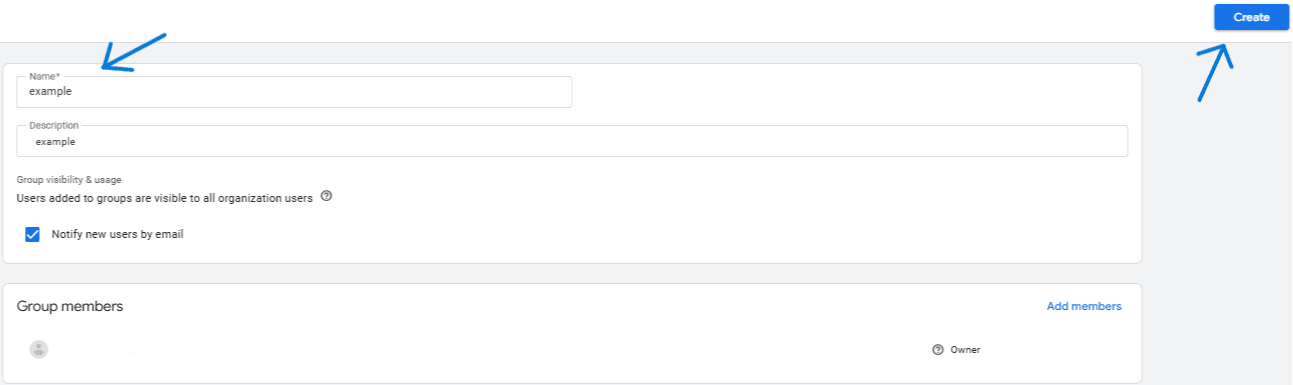
7. Choose the permissions you desire and then click ADD. (For more information on permissions, check out our guide.)
Once your group is set up, it’s visible in the users’ lists for both your Analytics account and your organization.
Your group’s permissions are contingent upon its level in the Analytics hierarchy. To illustrate, a group formed at the property level has only that property’s permissions.
However, a group created at the account tier has access to all properties. Refer to Edit user groups for further information on how to extend permissions across other tiers of the Analytics hierarchy.
Adding members to a user group can be achieved easily:
- Navigate to Admin and select either Account or Property, based on where your user group lies.
- Utilize the search bar located at the top of the list to locate your desired user group by its full or partial name.
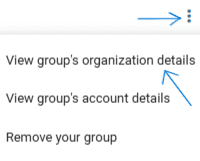
- Once your group is found, click on More in that specific row and select View group’s organization details.
4. Click on Members followed by the ‘+’ sign.
5. Enter the email addresses of users you want in your group.

6. If you wish to incorporate other groups into this one, click on ADD GROUP.
7. After you’ve added all desired users and groups, click on ADD.
![]()
8. Close down the Members panel and the group’s panel.
9. Don’t forget to save your changes.
Adding Your User Group to an Analytics Hierarchy Level
Once your group has been created, you can easily add it to any level within your Analytics hierarchy. This allows all members of the group to receive permissions for that particular level.
Navigate to Admin, and under either Account or Property (depending on where you wish to incorporate the group), select Access Management.
On the users list, select the + symbol, then choose Add user groups.
Press the ADD GROUP button.

Pick your preferred group, then select DONE.

Modifying User Groups

Once a user group is established, it can be edited by adding or deleting users, groups, and permissions. You also have the option to include the group into other groups.
Here are the steps to modify a user group:
Navigate to ‘Admin’ and select either ‘Account’ or ‘Property’, depending on where you wish to make alterations to your user group. This can be found under ‘Access Management’. Utilize the search tool found at the top of the list to pinpoint the specific user group you are interested in. You can enter a complete or partial group name to do so.
Upon identifying the desired group, select ‘More’ and then ‘View group’s organization details’. To incorporate new users or user groups, select ‘Members’, then click on ‘+’. Once the new members have been added, finalize by clicking ‘ADD’.

Similarly, to incorporate the group into other groups, choose ‘Group memberships’, then hit ‘+’. After choosing the preferred groups, press ‘DONE’.
To assign other levels of your Analytics hierarchy (properties, views) to the group:
- Click on ‘Analytics‘.

2. Extend the hierarchy, and hit ‘Edit’ on each level where you wish to make permission alterations.
3. Choose the permissions you want to add, then press ‘SAVE‘.
Follow the same steps when you want to remove users from the group, exclude the group from other groups, or make changes to permissions.
For more information on user groups, please refer to our learning resources.