In this article, we’ll explain how to link your Facebook Business Manager account to Ignite Digital, while editing permissions for Ignite Digital’s ad specialists. This is important because of the need to view & edit the many details Facebook Ads provides for your campaign’s success. This step-by-step guide is perfect for those unfamiliar with Facebook’s Advertising Business Suite & will help you seamlessly connect with Ignite Digital.
Getting Started – Facebook Business Suite
Let’s get started! First, we’ll need you to access your ‘Facebook Business Suite’. This is the location where you can control your Page Activity, Insights, and access to all the tools you need. Here’s what it looks like.

- On the left toolbar, Select ‘Settings’
- Select ‘Business Settings’
Business Settings Page
This will bring you to a new page with a detailed left toolbar featuring all of the details necessary for your business. Ensure you’re dealing with the correct company by checking the Company Name under ‘Business Settings’ on the left toolbar.
- Access Business Settings
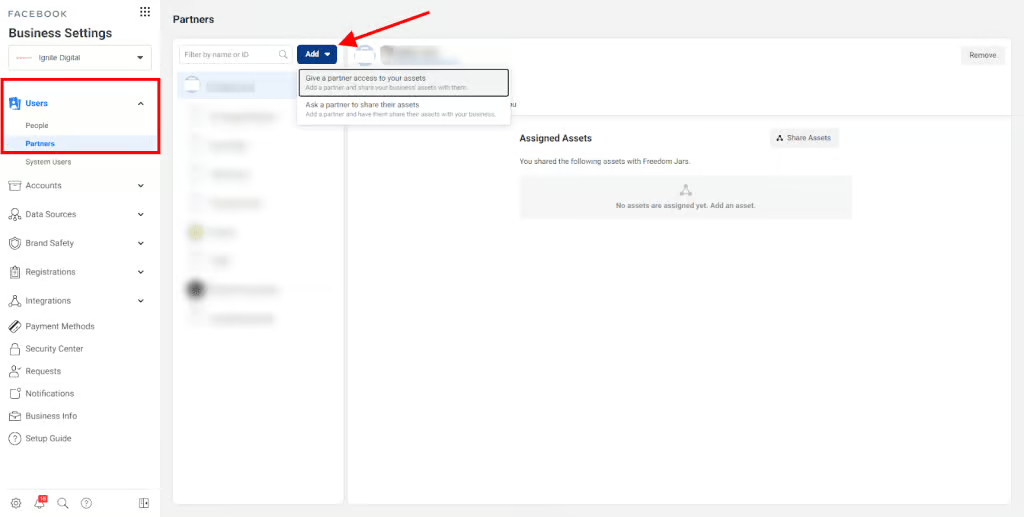
- Select ‘Partners’ under the ‘Users’ Tab
- Select ‘Add’ then ‘Give a Partner access to your Assets’
- Copy and Paste this Business Manager ID in the available space:
688068511337187
This will grant Ignite Digital access to your branding assets.

Assigning Assets
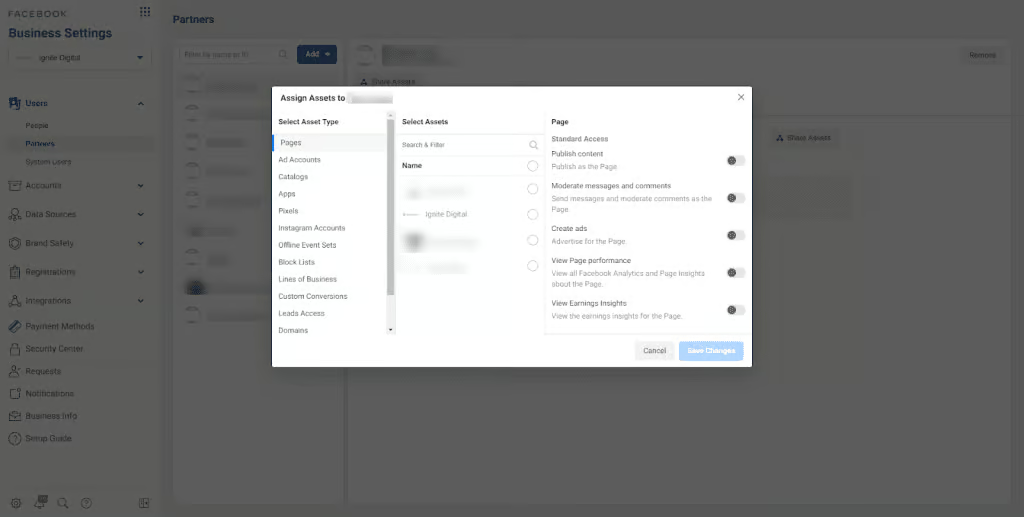
This will then direct you to a new popup window that allows you to assign and edit which permissions Ignite Digital has on your Business Manager account. In order to effectively create audiences, measure event data, and ensure your domain is protected via iOS14 guidelines, we’ll need access to the majority of permissions without accessing the information on billing details.
- Select ‘Pages’ Asset Type – Select ‘Admin Access – Manage Page’
- Select ‘Ad Account’ Asset Type – Select ‘Admin Access – Manage Ad Account’
- Select ‘Pixels’ Asset Type – Select ‘Admin Access – Manage Pixel’
- Select ‘Instagram Account’ Asset Type (if you have one) – Select ‘Instagram Page’
- Select ‘Domains’ Asset Type – Select the Verified Domain Available

Domain Verification
If unsure how to verify Domain / Domains are unverified – follow this step-by-step instruction:
- Verifying Your Domain – Sharing
- This is due to the new iOS14 Marketing Guidelines and to ensure your domain is the only domain receiving & sending Pixel information
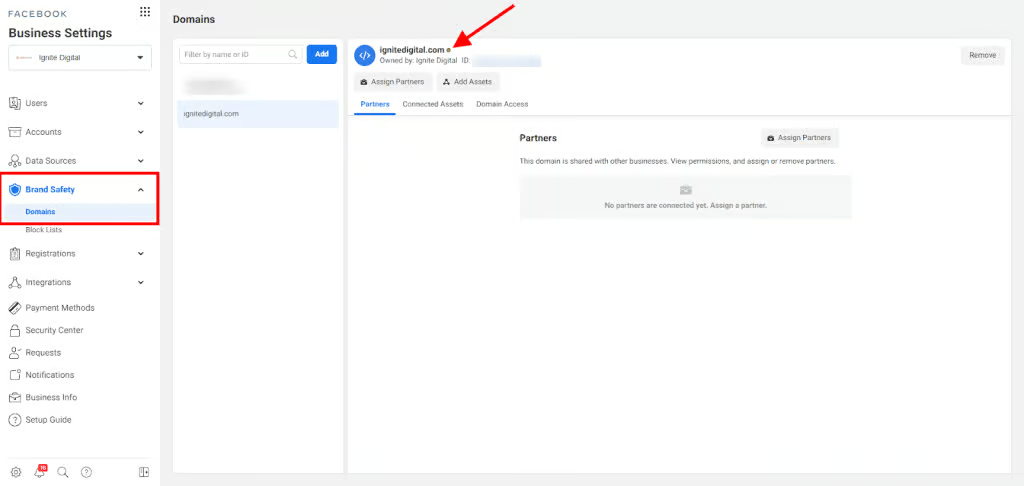
- To confirm domain is verified – Visit Business Settings – Brand Safety – Domains
If verified, your domain will have a GREEN dot beside
If unverified, your domain will have a RED dot beside


